20 Common Solar Installation Mistakes Every Solar Installer Should Avoid
Solar installation is more than connecting solar panels to an inverter and batteries. A system can have high-quality equipment and still perform poorly if the design, installation, configuration, or commissioning is done incorrectly.
For solar installers, small mistakes can result in low energy production, battery damage, inverter faults, unnecessary callbacks, electrical hazards, and unhappy customers.
Whether you are installing a small residential system or a large commercial solar solution, avoiding the following mistakes can significantly improve system performance, reliability, safety, and customer satisfaction.
1. Installing a System Without Performing a Proper Load Assessment
One of the most common mistakes is recommending a solar system before properly determining the customer’s actual energy requirements.
Some installers simply ask the customer how many appliances they have and immediately recommend a 3kVA, 5kVA, or 10kVA inverter.
This is not proper system design.
A proper load assessment should determine:
- The appliances being powered
- The rated power of each appliance
- How long each appliance operates per day
- Which appliances operate simultaneously
- Starting/surge requirements of motors and compressors
- Essential versus non-essential loads
- Expected future loads
For example, a refrigerator may have a relatively low running wattage but require significantly more power when its compressor starts.
Air conditioners, water pumps, refrigerators, freezers and other motor-driven equipment can have substantial starting currents.
How to avoid it
Create a detailed load schedule before selecting the inverter or battery.
Calculate:
Daily Energy Consumption = Appliance Power × Hours of Operation
Then determine the maximum simultaneous load and expected surge requirements.
Never size a system based solely on the customer’s statement that they need “a 5kVA system.”
2. Choosing the Inverter Before Calculating the Load
Another common mistake is starting with the inverter rather than the customer’s energy requirements.
For example:
“The customer has ₦X budget, so let’s install a 5kVA inverter.”
The correct process is the opposite.
Start with the load, determine the required power and energy, then select an inverter capable of handling those requirements.
The inverter should be evaluated based on:
- Continuous output power
- Surge capacity
- Maximum PV input
- MPPT voltage range
- Maximum PV current
- Battery voltage
- Battery chemistry compatibility
- Maximum charging current
- Number of MPPTs
- Grid/generator compatibility
A 5kVA inverter is not automatically suitable for every customer requiring approximately 5kVA of capacity.
How to avoid it
Design the system first and select the inverter afterward.
3. Incorrect Battery Sizing
Battery sizing is one of the areas where installers make expensive mistakes.
An installer may choose a battery based on inverter size rather than energy requirements.
For example, a 5kVA inverter does not automatically require a particular battery capacity.
Battery sizing depends on:
- Load demand
- Required backup duration
- Battery voltage
- Battery chemistry
- Depth of discharge
- Inverter efficiency
- Battery manufacturer’s recommended operating limits
For a simplified calculation:
Battery Energy Required ≈ Load × Backup Time ÷ System Efficiency
For lithium batteries, the usable capacity can generally be higher than for traditional lead-acid batteries, but the manufacturer’s specifications must always be followed.
How to avoid it
Calculate the required usable energy first and then select the battery bank.
Also consider the customer’s expected future loads.
4. Mixing Batteries Without Proper Compatibility Checks
Connecting batteries that differ significantly in:
- Age
- Capacity
- Chemistry
- Voltage
- Internal resistance
- State of health
- Manufacturer specifications
can create serious problems.
This is particularly important when expanding an existing battery bank.
A customer may say:
“I already have one battery. Just add another one.”
That does not necessarily mean the batteries should be connected together.
Different batteries can have different charging and discharge characteristics.
With lithium systems, BMS communication and battery compatibility can be especially important.
How to avoid it
Before connecting batteries in parallel or series, verify:
- Same nominal voltage
- Compatible chemistry
- Compatible capacity
- Manufacturer approval for the configuration
- Compatible BMS requirements
- Appropriate cables and protection
When in doubt, follow the battery manufacturer’s installation documentation.
5. Incorrect Solar Panel String Configuration
Solar panels cannot simply be connected in whatever arrangement produces the desired wattage.
The series and parallel configuration must fall within the inverter’s PV input specifications.
Installers should verify:
- Voc
- Vmp
- Isc
- Imp
- Maximum PV voltage
- MPPT operating voltage range
- Maximum PV input current
- Maximum PV power
For panels connected in series, voltage increases.
For panels connected in parallel, current increases.
An incorrect configuration can cause:
- Inverter shutdown
- MPPT failure
- Over-voltage faults
- Excessive current
- Reduced solar production
- Permanent equipment damage
How to avoid it
Calculate the cold-weather maximum string Voc and ensure it remains below the inverter’s maximum PV voltage.
Also ensure the operating voltage remains within the inverter’s MPPT range.
Never design strings using panel wattage alone.
6. Ignoring Temperature Effects on PV Voltage
PV voltage changes with temperature.
When solar panels become colder, their open-circuit voltage generally increases.
This means a string that appears safe under normal conditions could exceed the inverter’s maximum PV voltage under colder conditions.
Although this may be less dramatic in some tropical environments, temperature calculations should still be part of professional PV design.
How to avoid it
Use the panel’s temperature coefficient and the expected minimum site temperature to calculate maximum string voltage.
Do not simply multiply the panel Voc by the number of panels and assume the result is always safe.
7. Using Undersized Cables
Cable selection is not simply about whether a wire can physically carry the current.
Voltage drop, cable length, installation method, ambient temperature, grouping and conductor characteristics all matter.
An undersized cable can cause:
- Excessive voltage drop
- Heat generation
- Energy losses
- Poor inverter performance
- Premature cable deterioration
- Increased fire risk
The issue becomes particularly important on low-voltage, high-current battery circuits.
For example, a 48V battery system supplying several kilowatts can draw substantial DC current.
How to avoid it
Calculate cable size based on:
- Maximum current
- Cable length
- Acceptable voltage drop
- Installation conditions
- Conductor material
- Temperature
- Applicable electrical standards
Do not select cable size simply because “another installer uses the same size.”
8. Failing to Install Appropriate DC Protection
Solar PV systems operate with DC electricity, and DC behaves differently from AC.
A common mistake is using inappropriate protection devices or assuming an AC breaker is automatically suitable for PV DC circuits.
Depending on the system design, appropriate protection may include:
- DC isolators
- PV-rated fuses
- DC circuit breakers
- Surge protection devices
- Battery protection
- String protection
The correct protection depends on the equipment and system architecture.
How to avoid it
Use protection equipment specifically rated for the relevant DC voltage and current.
Verify the interrupting capacity and manufacturer’s specifications before installation.
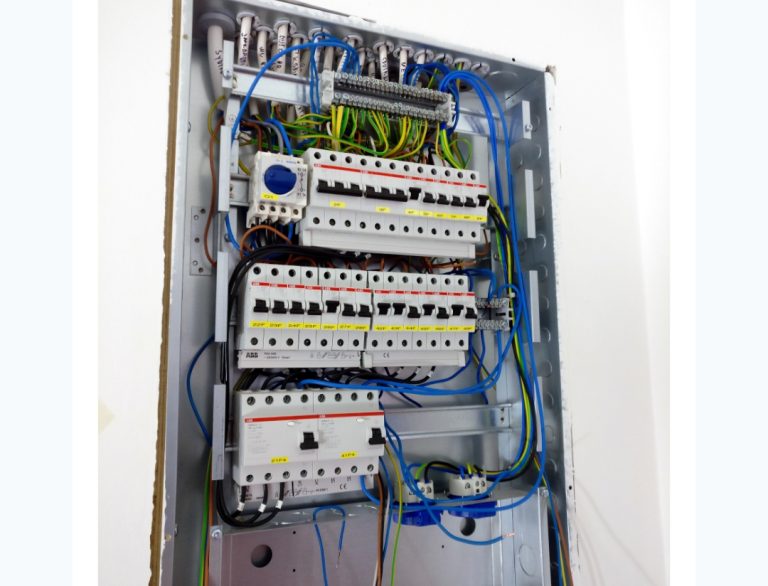
9. Poor Earthing and Bonding
Earthing is sometimes treated as an optional part of solar installation.
It is not.
Proper earthing and bonding are important for protecting people and equipment and for ensuring protective devices operate correctly when required.
Installers should consider:
- Equipment grounding
- Panel frames
- Mounting structures
- Inverter grounding requirements
- AC distribution equipment
- Surge protection
- Lightning protection where applicable
How to avoid it
Follow the applicable electrical code, local regulations and manufacturer’s requirements.
Do not assume that simply driving a metal rod into the ground automatically means the solar system is properly earthed.
10. Poor Installation of Surge Protection
Solar equipment can be vulnerable to transient overvoltages caused by lightning and switching events.
Surge protection devices (SPDs) can help protect sensitive equipment when correctly selected and installed.
However, installing an SPD simply because “every solar system needs one” without understanding the system configuration can also lead to poor protection.
How to avoid it
Select the appropriate SPD based on:
- AC or DC application
- System voltage
- PV configuration
- Earthing arrangement
- Equipment specifications
- Local electrical requirements
Keep connections appropriately short and follow the manufacturer’s installation instructions.
11. Installing Panels Where They Are Frequently Shaded
A solar panel can be technically perfect but still produce disappointing results if it is installed in a poor location.
Common sources of shading include:
- Trees
- Buildings
- Water tanks
- Poles
- Walls
- Satellite dishes
- Nearby structures
Even partial shading can significantly affect string performance depending on the system architecture.
How to avoid it
Perform a proper site assessment before installation.
Observe the site at different times of the day and consider seasonal changes.
Where necessary, use separate MPPT inputs or suitable module-level optimization strategies.
12. Installing Panels at an Inefficient Orientation or Tilt
Solar panels need adequate exposure to sunlight.
Installing panels without considering orientation, tilt, roof geometry and local solar conditions can reduce annual energy production.
Sometimes installers prioritize convenience over performance.
For example:
“Let’s put the panels here because the roof is easier to access.”
Ease of installation is important, but it should not compromise system performance.
How to avoid it
Evaluate:
- Roof orientation
- Tilt angle
- Shading
- Available installation area
- Structural considerations
- Maintenance access
The optimum configuration depends on the site and project objectives.
13. Poor Roof Mounting and Structural Installation
Solar panels add weight and wind loading to a roof.
A poor mounting system can result in:
- Loose panels
- Roof leaks
- Structural damage
- Corrosion
- Panel movement
- Premature failure
Installers sometimes focus heavily on electrical connections while paying insufficient attention to mechanical installation.
How to avoid it
Inspect the roof before installation.
Use appropriate mounting hardware and ensure attachment points are structurally sound.
Do not compromise waterproofing.
All roof penetrations should be properly sealed according to the roofing system and mounting manufacturer’s requirements.
14. Poor Ventilation Around the Inverter and Batteries
Heat is one of the enemies of electrical equipment.
Installing an inverter inside a small, poorly ventilated enclosure can cause temperatures to rise significantly.
Excessive heat may result in:
- Thermal derating
- Reduced inverter output
- Frequent shutdowns
- Reduced component lifespan
- Battery performance problems
How to avoid it
Install equipment according to the manufacturer’s required clearances.
Provide adequate ventilation and avoid placing equipment where it is exposed to unnecessary heat.
Do not install an inverter immediately above a heat-producing battery or other equipment unless the manufacturer permits that arrangement.
15. Incorrect Inverter and Battery Configuration
Even when the hardware is correctly installed, incorrect software settings can cause serious problems.
Common configuration errors include incorrect:
- Battery type
- Charging voltage
- Float voltage
- Low-voltage cutoff
- Maximum charging current
- Battery discharge current
- Grid charging settings
- Generator settings
- Lithium BMS settings
For lithium batteries, incorrect settings can interfere with the BMS or reduce battery life.
How to avoid it
Always obtain the battery manufacturer’s recommended charging and operating parameters.
If the inverter supports communication with the battery BMS, configure the communication protocol correctly.
Never guess battery settings.
16. Connecting Loads That Exceed the System’s Capacity
Some customers will eventually add more appliances.
A system that originally supported:
- TV
- Lights
- Fans
- Refrigerator
may later be expected to run:
- Air conditioners
- Water heaters
- Electric cookers
- Pumps
- Welding machines
- Large refrigeration equipment
If the additional loads are not considered, the inverter may repeatedly overload.
How to avoid it
Explain the system’s capacity clearly to the customer.
Label circuits where appropriate and identify which loads are essential and which are non-essential.
If future expansion is expected, design the system with scalability in mind.
17. Neglecting Voltage Drop
Voltage drop is often overlooked, especially when equipment is installed far apart.
Long cable runs can cause significant losses.
For example, a battery located far away from an inverter may require very large DC conductors because of the high current involved.
Voltage drop can cause:
- Inverter low-voltage alarms
- Reduced efficiency
- Cable heating
- Poor equipment performance
How to avoid it
Calculate voltage drop for both AC and DC circuits where applicable.
Keep high-current DC connections reasonably short whenever practical.
Use appropriate conductor sizes based on current, distance and acceptable voltage drop.
18. Failing to Label the Installation
A professional installation should be understandable to another qualified technician.
Poor labeling creates problems during:
- Maintenance
- Troubleshooting
- Repairs
- System expansion
- Emergency isolation
Labels can identify:
- PV strings
- DC isolators
- Battery circuits
- AC breakers
- Inverter circuits
- Essential-load circuits
- Grid input
- Generator input
How to avoid it
Clearly label the major components and circuits.
Where appropriate, provide the customer with a basic system diagram showing how the major components are connected.
Documentation is part of a professional installation.
19. Failing to Test the System Before Handover
One of the biggest mistakes is assuming that because everything has been connected, the installation is complete.
A professional installer should test the system before handing it over.
Depending on the system, commissioning may involve checking:
- PV voltage
- PV polarity
- Battery voltage
- Battery polarity
- AC voltage
- Current
- Inverter operation
- Charging
- Load operation
- Protective devices
- Monitoring
- BMS communication
- Error codes
- Generator/grid integration
How to avoid it
Create a commissioning checklist and use it for every installation.
Do not wait for the customer to discover problems after you leave.
20. Failing to Educate the Customer
A technically perfect solar installation can still become a “bad system” in the customer’s eyes if the customer does not understand how to use it.
Customers need to understand things such as:
- What the system can power
- How much backup time to expect
- How the battery should be used
- Which appliances should be avoided
- What different inverter alarms mean
- How to monitor system performance
- When maintenance is required
- What is covered by the warranty
For example, a customer may run a heavy electric heater continuously and then complain that the battery does not last.
That may not be a system failure.
It may simply be a mismatch between the customer’s usage and the system’s design.
How to avoid it
Give every customer a proper handover.
Explain the system in simple language and provide basic documentation.
A good installer doesn’t just install the system—they teach the customer how to get the best performance from it.
Bonus: The Installer’s Pre-Handover Checklist
Before leaving a solar installation, check the following:
System Design
- Load assessment completed
- Inverter correctly sized
- Battery correctly sized
- PV array correctly sized
- Future loads considered
PV System
- Panel orientation checked
- Shading assessed
- String configuration verified
- Polarity verified
- PV voltage measured
- DC protection installed correctly
- Connections properly tightened
Battery
- Battery voltage verified
- Correct cable size used
- Battery protection installed
- Battery settings configured
- BMS communication tested where applicable
- Battery terminals properly secured
Inverter
- Correct battery type selected
- Charging parameters verified
- Maximum charging current configured
- Low-voltage cutoff verified
- Grid/generator settings verified
- Monitoring configured
Safety
- Earthing completed
- Bonding completed where required
- AC/DC isolation provided
- Surge protection installed where required
- Equipment properly ventilated
- Warning and identification labels installed
Commissioning
- System switched on successfully
- Battery charging tested
- Solar charging tested
- Loads tested
- Grid input tested where applicable
- Generator input tested where applicable
- Monitoring tested
- No active fault codes
Customer Handover
- Customer trained
- System limitations explained
- Maintenance explained
- Warranty information provided
- Emergency shutdown procedure explained
- System documentation provided
Final Thoughts
Solar installation is a combination of electrical engineering, system design, practical workmanship, safety and customer education.
The most expensive mistakes are often not caused by defective equipment. They are caused by poor planning, incorrect sizing, inadequate protection, improper configuration and insufficient commissioning.
A professional installer should therefore think beyond:
“Can I make the system work?”
The better question is:
“Can I make the system work safely, efficiently, reliably and predictably for the next several years?”
That mindset separates an installer who simply connects equipment from a professional solar engineer who designs and delivers dependable energy systems.
Before every installation, take the time to measure, calculate, verify, install, test and document.
It can save you from unnecessary equipment failures, expensive callbacks and unhappy customers—and ultimately build a stronger reputation for your solar business.
Disclaimer: Electrical and PV installation requirements vary by equipment, jurisdiction and applicable standards. Installers should follow manufacturer instructions, local electrical regulations and relevant professional standards. High-voltage and high-current work should be performed by appropriately qualified personnel.