Solar Inverter Error Codes: My Complete Troubleshooting Guide
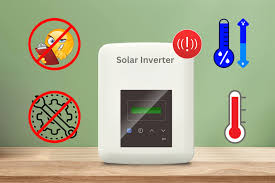
If you have worked with solar systems for any length of time, you already know that one of the most frustrating things that can happen after an installation is for the inverter to suddenly start beeping and display an error code.
A customer calls and says:
“The inverter is showing Fault 04. What does it mean?”
Sometimes the answer is straightforward. Other times, the error code is only the beginning of the troubleshooting process.
I have learned that one of the biggest mistakes we make as installers is assuming that an error code automatically tells us what component is bad. In reality, the inverter is simply telling us that it has detected something outside its expected operating condition.
The actual cause could be the battery, solar panels, load, wiring, temperature, grid, communication system, configuration—or the inverter itself.
And there is another important point that every installer needs to understand:
Inverter error codes are not universal.
A Fault 01 on one inverter brand can mean something completely different on another brand. Even different models from the same manufacturer can use different codes.
So before you tell a customer, “Fault 05 means your board is bad,” stop and check the manual for that particular inverter.
In this guide, I want to walk through some of the most common inverter problems I encounter and how I approach troubleshooting them.
First Things First: Don’t Panic When You See an Error Code
An error code doesn’t automatically mean the inverter is damaged.
In many cases, the inverter is actually doing exactly what it was designed to do: protecting itself and the rest of the system.
For example, if the inverter detects that the battery voltage is too low, it may shut down to prevent further battery discharge.
If it detects excessive PV voltage, it may disconnect the solar input.
If the temperature becomes too high, it may reduce its output or shut down.
So I don’t look at an error code and immediately conclude that the inverter has failed.
I first ask:
What happened immediately before the fault appeared?
Was there a heavy load?
Did the battery become low?
Did the grid return?
Was there a storm?
Was the generator switched on?
Was the solar array recently modified?
Did someone change the inverter settings?
Those questions often tell me more than the error code itself.
1. Overload Fault
This is probably one of the easiest faults to understand.
The inverter is basically saying:
“You are asking me to supply more power than I can handle.”
I’ve seen this happen many times, especially when customers gradually add appliances to a system.
A customer may initially install a system to power:
- Lights
- Fans
- TV
- Refrigerator
- Decoder
- Small appliances
Then, six months later, an air conditioner is added.
Then a water pump.
Then a microwave.
Then an electric kettle.
Eventually, the inverter starts complaining.
What causes an overload?
Common causes include:
- Too many appliances operating simultaneously
- Incorrect system sizing
- Air-conditioner compressor starting
- Water pump starting
- Electric heater
- Electric cooker
- Welding machine
- Faulty appliance
- Short circuit
The important thing is to distinguish between continuous load and surge load.
A motor may consume much more power for a short period when starting than it consumes while running.
What I check
I start by reducing the load.
If the inverter immediately starts working normally after some appliances are switched off, I know I need to investigate the load rather than blaming the inverter.
I then calculate the actual connected load and compare it with the inverter’s continuous and surge capabilities.
2. Low Battery Voltage
This is another very common one.
The inverter detects that the battery voltage has dropped below its acceptable operating level and shuts down or raises an alarm.
I’ve seen installers replace batteries unnecessarily because they assumed that a low-voltage fault meant the battery was bad.
Sometimes the battery is perfectly fine.
The customer may simply be running too much load.
Possible causes
- Battery is genuinely low
- Battery capacity is too small
- Excessive load
- Poor solar charging
- Battery is old or degraded
- Undersized battery cables
- Loose terminals
- Incorrect inverter settings
- BMS protection
- Excessive voltage drop
What I check
I don’t just look at the percentage displayed on the inverter.
I check the actual battery voltage where appropriate and look at what the system is doing at that moment.
If the battery voltage looks normal when there is no load but drops dramatically when a heavy load is switched on, I investigate the battery, cables, connections and voltage drop.
3. Battery Overvoltage
This is basically the opposite situation.
The inverter is detecting a battery voltage that is higher than the acceptable range.
This can be caused by incorrect charging settings, multiple charging sources or a battery/BMS problem.
Possible causes
- Incorrect charging voltage
- Wrong battery type selected
- Incorrect lithium battery settings
- Charger problem
- Multiple charging sources
- Battery BMS issue
- Incorrect battery configuration
What I do
I verify the actual battery voltage using the appropriate test equipment.
Then I compare it with the battery manufacturer’s specifications.
I don’t randomly change the charging parameters just to make the error disappear.
That is an important lesson for installers:
Making an error code disappear is not the same thing as fixing the problem.
4. PV Overvoltage
This is one of the faults I take seriously.
The inverter is telling you that the voltage coming from the solar panels is too high.
This is often caused by putting too many panels in series.
For example, an installer may see a 550W panel and think:
“I need 11kW of panels, so I’ll just put 20 panels together.”
That’s not how PV design works.
You need to consider:
- Voc
- Vmp
- Isc
- Imp
- Maximum PV voltage
- MPPT operating range
- Maximum PV current
- Temperature coefficient
The number of panels in series determines the string voltage.
One mistake I see
Some installers calculate the string voltage using the panel’s Vmp and stop there.
That’s not enough.
You also need to consider Voc, especially under colder conditions, because PV open-circuit voltage increases as temperature falls.
What I check
I check the panel datasheet and the inverter datasheet.
Then I calculate the expected string voltage and make sure it remains within the inverter’s permitted range.
Never guess your PV string configuration.
5. PV Undervoltage or Low PV Input
Sometimes the inverter doesn’t see enough voltage from the solar array.
There are several possible reasons.
It could simply be early morning or late afternoon.
But if it happens in the middle of a bright sunny day, I start investigating.
Possible causes
- Shading
- Dirty panels
- Damaged panel
- Loose connector
- Broken cable
- Open circuit
- Faulty isolator
- Incorrect string configuration
- Wrong polarity
What I check
I check the PV string voltage and compare it with what I expect from the number of panels connected in series.
If I have 10 panels in series and I’m getting a voltage that looks like only a few panels are connected, I know something is wrong.
This is where proper measurement saves a lot of time.
6. Reverse PV Polarity
This happens when the positive and negative sides of a PV string are connected incorrectly.
It is usually a wiring mistake.
I’ve seen installers assume that because the connectors physically fit, everything must be correct.
That’s dangerous.
What can cause it?
- Incorrect MC4 termination
- Reversed cable
- Wiring mistake
- Incorrect string labeling
- Connector installed incorrectly
The polarity should be verified using appropriate test equipment before connecting the array to the inverter.
Don’t rely on cable colour alone.
7. Ground Fault or Insulation Fault
This is one fault I don’t recommend ignoring.
A ground or insulation fault can indicate that current is leaking somewhere it shouldn’t.
The problem could be in:
- PV cables
- Connectors
- Solar panels
- Junction boxes
- Mounting components
- Other parts of the DC system
Water is also a common enemy of outdoor PV installations.
A connector that wasn’t properly installed can allow moisture in, and that can eventually create insulation problems.
My approach
I don’t keep resetting the inverter and hoping the fault disappears.
I inspect the PV wiring and use the appropriate testing equipment to identify the affected circuit.
If you’re not qualified to perform insulation or electrical fault testing, this is the point where you should bring in someone who is.
8. Inverter Overtemperature
I’ve seen perfectly good inverters behave badly simply because they were installed in the wrong place.
An inverter needs to get rid of the heat it generates.
If you put it inside a small, enclosed cabinet with poor airflow, you’re creating a problem.
Common causes
- Poor ventilation
- High ambient temperature
- Blocked vents
- Dust
- Failed cooling fan
- Direct heat exposure
- Inverter operating continuously near maximum capacity
The inverter may start reducing its output before eventually shutting down.
What I check
I look at:
- Installation location
- Ventilation
- Clearance around the inverter
- Fan operation
- Ambient temperature
- Dust accumulation
Don’t treat ventilation as an afterthought.
9. Grid Overvoltage
Hybrid and grid-connected inverters monitor the utility supply.
If the grid voltage goes beyond the inverter’s acceptable range, the inverter may disconnect from the grid.
This doesn’t necessarily mean the inverter is faulty.
Sometimes the grid itself is the problem.
Possible causes
- High utility voltage
- Poor grid regulation
- Incorrect inverter settings
- Loose neutral
- Wiring problems
What I do
I measure the incoming AC voltage.
If the grid voltage itself is outside the acceptable range, I don’t simply modify the inverter’s protection settings to force it to stay connected.
The underlying problem needs to be addressed.
10. Grid Undervoltage
This is the opposite of grid overvoltage.
The inverter detects that the incoming AC voltage is too low.
This can happen frequently in areas with an unstable or weak power supply.
Possible causes
- Weak utility supply
- Heavy loads on the local network
- Long cable run
- Undersized cable
- Loose connection
- Generator problem
If the voltage drops whenever a large appliance starts, I investigate the source of the voltage drop instead of immediately blaming the inverter.
11. Grid Frequency Fault
Inverters don’t only monitor voltage.
They also monitor frequency.
If the frequency moves outside the inverter’s permitted range, it may disconnect from the grid.
This can be particularly important when a generator is being used as an alternative AC source.
A poorly regulated generator can create frequency problems.
What I check
I check the actual frequency and determine whether the issue is coming from:
- Utility supply
- Generator
- Inverter configuration
- Wiring
- Sensing equipment
12. AC Short Circuit
An AC short circuit can cause the inverter to shut down very quickly.
The cause may be an appliance, cable, circuit or wiring error.
Possible causes
- Faulty appliance
- Damaged cable
- Incorrect wiring
- Water ingress
- Shorted circuit
- Installation error
I don’t repeatedly turn the inverter back on when I suspect a short circuit.
First, the affected circuit needs to be identified and properly tested.
13. DC Overcurrent
A DC overcurrent fault means the inverter has detected excessive current on the DC side.
Depending on the inverter design, this could relate to the PV input or battery side.
Possible causes
- Incorrect PV configuration
- Too many parallel strings
- Short circuit
- Battery connection problem
- Incorrect wiring
- Equipment fault
The first thing I do is compare the actual system configuration with the inverter’s maximum allowable current.
Again, this is why reading the datasheet before installation matters.
14. Arc Fault
Arc faults deserve serious attention.
A DC arc can occur when electricity jumps across a gap caused by a poor connection, damaged cable or faulty connector.
Possible causes include:
- Loose connector
- Poor crimp
- Damaged cable
- Poor MC4 connection
- Damaged solar module
- Cable insulation damage
If the inverter reports an arc fault, I don’t simply reset it and continue.
I investigate the PV system.
Repeated arc faults should never be treated as a nuisance alarm.
15. Battery Communication Error
This is becoming more common as more installers move from traditional lead-acid batteries to lithium systems.
Modern lithium batteries often communicate with hybrid inverters through CAN, RS485 or another communication interface.
When that communication fails, the inverter may report a battery communication fault.
Possible causes
- Wrong communication cable
- Wrong communication port
- Incorrect protocol
- Incorrect DIP switch settings
- BMS turned off
- Firmware compatibility issue
- Loose communication connection
One thing I’ve learned is that not every CAN or RS485 cable has the same pinout.
So don’t assume that because a cable fits the port, it is correctly wired.
Always check the battery and inverter documentation.
16. BMS Protection Fault
Sometimes the inverter is not the problem at all.
The battery’s BMS may have deliberately disconnected the battery because it detected an unsafe condition.
The BMS may protect against:
- Overvoltage
- Undervoltage
- Overcurrent
- High temperature
- Low temperature
- Cell imbalance
- Short circuit
If this happens, I look at the battery side of the system rather than assuming the inverter is faulty.
17. Cooling Fan Fault
Some inverters rely on cooling fans.
If a fan fails or becomes blocked, the inverter can overheat.
Possible causes
- Failed fan
- Dust
- Foreign object
- Fan wiring issue
- Sensor problem
If the inverter specifically reports a fan fault, I follow the manufacturer’s recommended service procedure.
I don’t ignore it because the inverter is “still working.”
18. Internal Hardware Fault
Eventually, you will encounter faults where everything external appears normal and the inverter still refuses to operate.
At that point, the inverter itself may have an internal problem.
Possible components include:
- Control board
- Sensors
- Relays
- Capacitors
- Power electronics
- Communication board
- Internal temperature sensor
This is where I stop guessing.
If I’ve checked the external conditions and the fault persists, I contact the manufacturer, distributor or qualified service technician.
Opening an inverter and attempting board-level repairs without the appropriate knowledge and equipment can create a much bigger problem.
19. Wi-Fi or Monitoring Offline
Here’s another one that confuses customers.
The monitoring application says:
“Inverter offline.”
The customer assumes the solar system has stopped working.
But the inverter itself may actually be operating perfectly.
The problem may simply be the communication device.
Possible causes
- Router changed
- Wi-Fi password changed
- Internet connection lost
- Poor signal
- Monitoring dongle disconnected
- Cloud service problem
- Communication device failure
The first thing I check is the physical inverter display.
If the inverter is producing solar power and supplying the loads normally, then I troubleshoot the monitoring connection separately.
20. Firmware and Configuration Problems
Modern solar inverters are not just electrical devices.
They are also software-controlled systems.
Incorrect settings can create problems that look like hardware faults.
I’ve seen issues caused by incorrect:
- Battery type
- Charging voltage
- Discharge settings
- Grid settings
- CT configuration
- Generator settings
- Parallel settings
- Operating mode
- BMS protocol
Firmware can also affect compatibility with batteries and accessories.
One rule I follow
I don’t change settings randomly just because someone on Facebook or WhatsApp said:
“Change this setting and the fault will disappear.”
Always check the manufacturer’s documentation.
How I Troubleshoot an Inverter Error
When someone calls me and says:
“My inverter is showing an error.”
I don’t start guessing.
I follow a process.
Step 1: I ask for the exact inverter model
“5kVA inverter” isn’t enough.
I need to know the:
- Brand
- Model
- Capacity
- Sometimes firmware version
Step 2: I ask for the exact error code
I don’t want:
“It’s showing something like 04.”
I want the exact code and, preferably, a picture of the display.
Step 3: I ask what happened before the fault
This question can be very useful.
I ask:
- What appliances were running?
- Was there grid power?
- Was the generator running?
- Was the battery low?
- Was there sunlight?
- Did someone change anything?
- Did the fault happen immediately or after some hours?
Step 4: I check the obvious things first
Depending on the situation, I check:
- Breakers
- Isolators
- Battery connections
- PV connections
- Visible cables
- Ventilation
- Physical damage
- Water ingress
Step 5: I measure instead of guessing
Where appropriate and where I am properly equipped and qualified, I check:
- PV voltage
- Battery voltage
- AC voltage
- Frequency
- Current
- Continuity
- Insulation
Measurements give me facts.
Guesswork gives me more problems.
Step 6: I compare the measurements with the specifications
This is where the inverter manual and equipment datasheets become important.
I compare the measured values with the manufacturer’s specified operating limits.
Step 7: I fix the cause, not just the error message
If the inverter is overloaded, I address the overload.
If the PV voltage is too high, I correct the PV configuration.
If the battery is undersized, I address the battery capacity.
If the inverter is overheating, I address the installation environment.
The goal isn’t simply to make the error disappear.
The goal is to make sure it doesn’t come back.
A Quick Solar Inverter Troubleshooting Table
| Problem | Possible Cause | What I Check First |
|---|---|---|
| Overload | Too many appliances | Reduce load |
| Low battery | Excessive load/low SOC | Battery voltage and load |
| Battery overvoltage | Incorrect charging settings | Battery voltage/settings |
| PV overvoltage | Too many panels in series | String Voc |
| Low PV voltage | Shade/open circuit | PV string voltage |
| Reverse polarity | Wiring error | PV polarity |
| Ground fault | Cable/insulation problem | PV wiring |
| Overtemperature | Poor ventilation | Airflow and fan |
| Grid overvoltage | Utility supply | AC voltage |
| Grid undervoltage | Weak supply/cable drop | AC voltage |
| Frequency fault | Grid/generator instability | Frequency |
| AC short circuit | Appliance/wiring fault | AC circuits |
| DC overcurrent | Incorrect configuration | PV/battery current |
| Arc fault | Poor PV connection | Connectors/cables |
| Battery communication | CAN/RS485 issue | Cable/protocol |
| BMS protection | Battery safety condition | Battery/BMS |
| Fan fault | Fan failure/blockage | Cooling system |
| Internal fault | Hardware problem | Manufacturer/service |
| Wi-Fi offline | Network/monitoring problem | Dongle/network |
| Configuration fault | Wrong settings | Inverter parameters |
One important warning: Don’t use the table above as a universal error-code chart. It tells you the type of problem, not what a particular numerical code means on every inverter.
The Biggest Mistake: Assuming the Code Tells You Everything
This is probably the most important point I can make.
An inverter might display:
Fault 05
That doesn’t give you enough information by itself.
I need to know:
Which inverter?
Which model?
What was the inverter doing when the fault appeared?
What are the PV and battery conditions?
What loads were connected?
What does the manufacturer’s manual say?
This is why I always recommend keeping the inverter manual available, especially during installation and commissioning.
My Basic Installer Troubleshooting Checklist
Before I leave an installation, I want to know that I’ve checked the major parts of the system.
PV side
- PV polarity verified
- String voltage verified
- String configuration verified
- PV current within inverter limits
- No obvious shading problem
- Connectors properly installed
- Cables properly secured
- DC protection installed correctly
Battery side
- Battery voltage verified
- Battery cables correctly sized
- Connections properly tightened
- Battery protection installed
- Battery settings configured correctly
- BMS communication tested where applicable
- Battery limits verified
Inverter
- Correct battery type selected
- Charging settings checked
- Discharge settings checked
- Grid settings checked
- Generator settings checked where applicable
- Cooling and ventilation checked
- Monitoring configured
Safety
- Earthing completed
- Appropriate isolation provided
- AC/DC protection checked
- Surge protection considered/installed where required
- Warning labels installed
- Equipment securely mounted
Final commissioning
- Solar charging tested
- Battery charging tested
- Loads tested
- Grid operation tested where applicable
- Generator operation tested where applicable
- Monitoring tested
- Error history checked
- Customer trained
Final Thoughts
After working with solar systems, I’ve come to realize that troubleshooting is one of the skills that separates an installer from a really good installer.
Anybody can connect panels, batteries and an inverter when everything is working perfectly.
The real test comes when the inverter starts beeping at 2pm on a hot afternoon and the customer calls saying:
“The light has gone off. The inverter is showing an error.”
That’s when you need to remain calm and troubleshoot logically.
Don’t replace a battery because the inverter says “low voltage.”
Don’t replace an inverter because it says “overload.”
Don’t rearrange PV panels without calculating the string voltage.
And don’t keep resetting a fault without finding out why it happened.
Read the code. Understand the system. Take measurements. Check the specifications. Find the root cause. Then fix it.
That’s the approach that saves equipment, saves money and, most importantly, keeps customers confident in your work.
Solar installation is not just about making electricity.
It’s about designing and maintaining a system that people can depend on.
And when something goes wrong, a good installer should be able to explain what happened, why it happened, and what needs to be done to prevent it from happening again.